Monday, 26 September 2016

Delicate stencils


Have had so much fun playing with my inks this week, in this case seedless preserves and peacock feathers from the distress ink range.

I used super smooth Kraft card by Crafters Companion for this project as it takes inks, alcohol markers and blendable pencils brilliantly. The stencil is from Creative Expressions (damask). The rose and leaf dies are Creative Expressions, the poinsettia is by Spellbinder, I inked through the dies to colour the die cut, they were embossed and shaped befor putting them on the card.

I cut a small mat for the centre to mount the sentiment on which is by Creative Expressions and coloured using the inks after I removed it from the die. I embossed the mat using a embossing folder from the Sara Davis Signature Collection from Crafters Companion. Bothe the centre and the backing layout were matted on to my favorite black card as it helps make each bit pop.

I used the Clarity stencil brushes to blend the inks so I could achieve the gently blend from one colour to the next. As I have found the blending tools with the foam pads tends to give me a heavier saturation of ink and for this project I wanted the softness the brushes gave me.

Hope you like it and keep an eye for my next project.

Thursday, 22 September 2016

Moonlight

Have had a great day playing with inks and stencils, plus a little bit of guilding wax. 


This topper is on craft card. the inks I used were stormy sky and crushed olive distress inks, these were brushed on using Clarity stamps stencil brushes, to create a background. 

the deer stencil is a mini one from creative expression,  I drew through the stencil and the coloured them black using an alcohol marker. I also drew two trees on either side using the alcohol marker.

 The die cut trees are from Sheena Douglas Christmas range I cut the die cut apart ti give me three separate trees and used guilding wax to give them a moonlight shine. I also used guilding wax on the moon that I had masked off and a little on the deer.

 The sentiment is a creative expressions die.

Fluttering by


To create this card I used Clarity's Groovi boards. 
Plate mate
Fuchsia board 
Netting,
Henna border plate
Large box frame.

First using the large box frame and a 1mm embossing tool to get a crisp white line. I traced the inner and outer boxes only.

I then places the fuchsia plate in to th plate mate and using a 1.5 mm ball tool I out lined the bird and various flowers and leaves to create he desired image in the centre square. I then places the netting into the plate mate and went back to my 1 mm ball tool, I traces the grid pattern to fill the whole of the outside of the square frame I had created. I them swapped over to the border plate mate and the henna border to trace a frilly edge around the outside of the design.

Now to emboss the centre images, at first I use my largest ball tool, to start stretching the parchment gently. ( I use a tumble dryer sheet to stop the ball tool dragging). I then change down in size ball tool to help the parchment stretch more to give a whiter finish, when I an happy with how white I want it to be I leave it to rest, befor embossing one more time.

I used a two needle tool to edge the design as well as following the grid lines I created using the netting plate. 

I then cut out the area I had pricked around using parchment scissors. I am entering this in the 

Clarity challenge blog " in the garden"

Tuesday, 9 August 2016


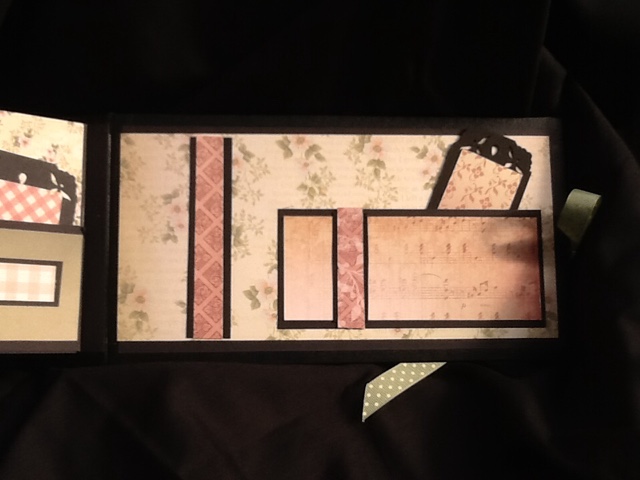
I had so much fun creating a building this book in a box album, I used mount board ( but you could use chip board) and worked out my measurements I based it all around 12x12 papers as I wanted to used them to decorate it.

Each piece of mount board was painted with black jesso prior to building it. I used black card as a base for the internal pages also as strips scored and folded to assist in gluing it all together, and black electrical tape to make the hinges. 

Off to the NEC tomorrow ready for the festival of quilts for more inspiration of crafty things to make!


Tuesday, 10 May 2016

Black white grey?

Black white !


Equipment

Stamp scruffily little kitten 'Freddie' by crafters companion
Embossing folder pop dotty- just for men by crafters companion
Moment ink black tuxedo
Promarker's ice grey 1-5
Distress ink vintage photo

To make this card I stamped Freddi using momento ink, on super smooth card stock.

I then coloured the image starting with ice grey 1. I coloured the whole image with the promarker. Then working on the face, I used ice grey 2 to colour around the edge about a 1/4 of the way in using small circular motions. Then. Used ice grey 3 colour 1/4 of the area coloured with ice grey 2, then using ice grey 4 I carefully coloured the endless of the face once I had done this I finally coloured over all of the face with ice grey 1 blending all the tones together. I repeated this process over all of the image creating shadow and dimension.

Once the image was coloured I tinted it using vintage photo distress ink.  I mounted it on black card. I then used the embossing folder on a piece of white card, and tinted that with the same distress ink. Mounted the embossed. Are on black card. I placed the stamped image in the centre of the embossed card. I them put the topper on to a blank 7x7 scalloped edge white card.

I enjoyed colouring this card, the idea came from the vintage black and white photos that were often colour tinted.

Here is one I did using the wood ware stamp anenomie , and milled lavender distress ink. And docrafts basket weave embossing folder.


Thursday, 5 May 2016

Taking flight


Today's cards has used the panel, flourish and butterfly wreath plates and a diagonal grid.

I used the panel plate first to create the initial outline, I then place the parchment over the flourish plate and copy the outline. I then replace the parchment onto the panel plate being careful to line it up and emboss the second line making sure not to go over the flourish just embossed.

Then using the butterfly wreath line up the circle so it is central to the circle of the flourish, now emboss the butterfly and the circle around it.

Now colour on the reverse using blendable pencils. When you have finished colouring turn the parchment over and place on diagonal grid and pricking mat. Prick every hole around the flourish design.
Remove parchment from grid and replace on the pricking mat, using a two needle tool prick around the butterfly and the inside of the circle. Also prick around the outside of the piece of work now cut to create the stamp edge.

Last but not least using the clear spectrum sparkle pen carefully go over the butterfly blotting it as you apply the pen to remove excess ink do the same on the border, plenty of sparkle will be left behind on the parchment after blotting, but without doing that the parchment is likly to wrinkle as it doesn't like to be wet.

Hope you enjoyed doing this project and are having fun on this sunny May Day.